Step-by-Step Build Guide
From trailer selection to move-in day — a 12-stage build process with checklists, costs, and expert tips for every stage of your tiny house.
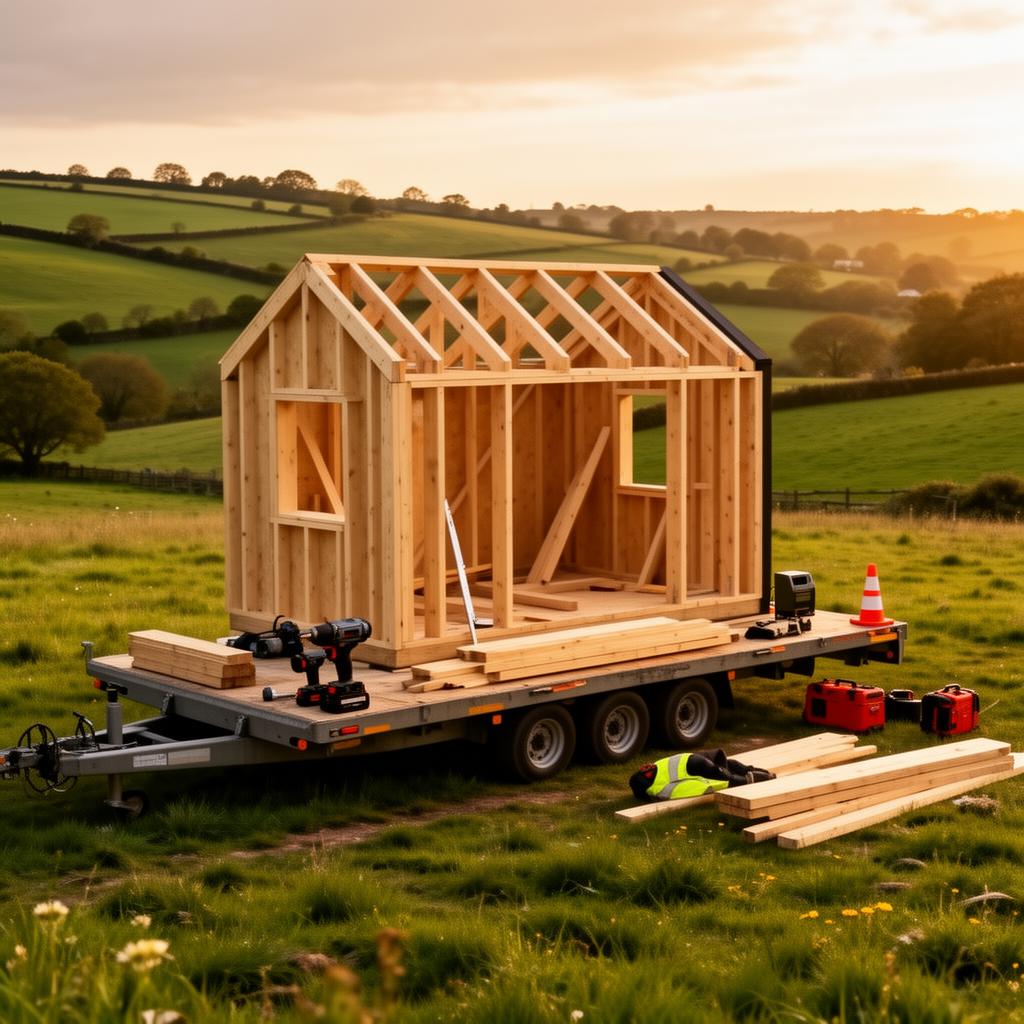
Trailer / Foundation Selection
Your foundation choice determines everything — from legal classification to structural approach. For a tiny house on wheels (THOW), a purpose-built galvanised steel trailer is essential. For a permanent build, consider screw piles, concrete pad, or strip foundations.
What you need to know
- Purpose-built tiny house trailers (e.g. from Tiny House Trailer Co, Brian James) are designed with a flat deck and outrigger supports, unlike standard car trailers.
- Standard UK trailer widths: 2.55m (road-legal without escort) or up to 3.5m (requires wide-load escort). Max towing length: 7m without articulated registration.
- For permanent foundations, screw piles are popular — no concrete needed, reversible, and often preferred by planners in sensitive areas.
- Ensure your trailer is rated for the total weight of your build (typically 3,500kg for a single-axle, up to 5,000kg for twin-axle).
Stage 1 Checklist
- Decide: wheels or permanent foundation
- Calculate target total weight (structure + contents)
- Source trailer or commission foundation design
- Check trailer is galvanised and rated for load
- Verify road-legal dimensions if THOW
- Level and brace the trailer/foundation on site
Pro Tips
- →Don't buy a secondhand car trailer — they're not designed for static loads and will flex.
- →If going permanent, get a structural engineer to sign off your foundation design.
Design & Planning
Finalise your floor plan, elevation drawings, and material schedule before you pick up a single tool. This is where you decide on layout, window positions, door placement, and roof pitch.
What you need to know
- Use free tools like SketchUp or paid software like Chief Architect to model your design in 3D.
- Consider the 'work triangle' for kitchen layout — sink, cooker, and fridge within easy reach.
- Plan your electrical layout at this stage: socket positions, lighting runs, consumer unit location.
- If you need planning permission, your drawings will need to be to scale with a site plan, floor plans, and elevations.
Stage 2 Checklist
- Choose floor plan layout (open-plan, loft bedroom, ground-floor bedroom)
- Decide on roof style (shed, gable, gambrel)
- Mark window and door positions
- Plan electrical socket and switch locations
- Plan plumbing runs (kitchen sink, bathroom, shower)
- Create material take-off list and budget
- Submit planning application if required
Pro Tips
- →Build a cardboard mock-up at full scale to test the layout before committing.
- →Standard UK door width is 762mm — go narrower at your peril.
Subfloor & Floor Framing
The subfloor sits on top of your trailer deck or foundation and provides the structural base for walls. Insulate it well — cold floors are the number one complaint in poorly built tiny houses.
What you need to know
- For THOW: bolt pressure-treated timber joists to the trailer chassis using carriage bolts or welded brackets.
- Insulate between joists with rigid PIR board (e.g. Celotex/Kingspan) — 50mm minimum, 100mm recommended for UK climate.
- Seal all joints with foil tape to create a continuous vapour barrier.
- Top with 18mm structural plywood or OSB as your subfloor deck.
Stage 3 Checklist
- Bolt or weld joist brackets to trailer/foundation
- Install pressure-treated floor joists at 400mm centres
- Cut and fit rigid insulation between joists
- Tape all insulation joints with foil tape
- Lay and screw subfloor plywood/OSB
- Check level across entire floor (max 3mm deviation per metre)
Pro Tips
- →Use stainless steel or hot-dip galvanised fixings throughout the subfloor — moisture will find its way in.
- →Leave access points if you're running underfloor plumbing.
Wall Framing
Frame your walls using 50×100mm (2×4) or 50×150mm (2×6) CLS timber. The thicker option gives more insulation depth, crucial for UK winters. Build each wall as a flat panel on the floor, then raise it into position.
What you need to know
- Space studs at 600mm centres to match standard insulation batt widths.
- Double up studs at corners and either side of window/door openings. Add cripple studs and headers above openings.
- Use a sole plate (bottom) and double top plate for structural continuity. Bolt sole plates to the subfloor/trailer.
- Brace walls temporarily with diagonal battens until sheathing is applied.
Stage 4 Checklist
- Cut all studs, headers, and plates to length
- Assemble each wall panel on the deck
- Raise walls and brace temporarily
- Check plumb and square with a spirit level
- Bolt sole plates to subfloor
- Install double top plate, lapping joints at corners
- Frame window and door openings with headers
Pro Tips
- →Pre-drill and screw rather than nail — it's easier to correct mistakes and results in a stronger joint.
- →Mark stud positions on the floor before raising so you know exactly where they'll land.
Roof Framing
Your roof structure can be rafters (for gable/gambrel) or a simple mono-pitch (shed roof). A shed roof is easiest for beginners and works well for loft bedrooms. Ensure adequate pitch for water runoff — minimum 15° for most coverings.
What you need to know
- For a shed roof: run rafters from a raised wall (front) to a lower wall (rear) at the desired pitch. Use joist hangers or birdsmouth cuts.
- For a gable roof: build triangular trusses on the ground and lift into position. Brace with purlins.
- Overhang rafters by 300–450mm to protect walls from rain (critical in the UK).
- Consider a loft hatch vs. permanent loft ladder for bedroom access.
Stage 5 Checklist
- Decide roof style and pitch angle
- Cut rafters with birdsmouth notches
- Install rafters at 600mm centres
- Add ridge board (gable) or fix to wall plates (shed)
- Install purlins for mid-span support if needed
- Add fascia boards and soffit
- Check roof is square and level
Pro Tips
- →A shed roof with a 20° pitch is the sweet spot for UK rain runoff and loft headroom.
- →If using a loft bedroom, ensure at least 900mm sitting height at the mattress position.
Sheathing & Weatherproofing
Before insulation goes in, the outside of your frame needs structural sheathing (OSB or plywood) and a breathable membrane. This creates the weather-tight shell — known as getting to 'dry envelope'.
What you need to know
- Apply 9mm or 12mm OSB3 or plywood sheathing to the exterior of wall and roof framing.
- Wrap the entire structure in a breathable membrane (e.g. Tyvek Housewrap) — this allows moisture vapour out but keeps wind and rain out.
- Tape all membrane overlaps with approved tape (minimum 150mm overlap).
- Install the roofing membrane or felt underlay, working from eaves to ridge.
Stage 6 Checklist
- Fix sheathing boards to wall studs and roof rafters
- Stagger joints between sheets (avoid continuous vertical lines)
- Wrap breathable membrane around walls, bottom to top
- Tape all membrane joints and around openings
- Install roof underlay from eaves to ridge
- Fit drip edges and any lead flashing
- Check for any gaps or tears in the membrane
Pro Tips
- →Get to dry envelope as fast as possible — UK weather won't wait for you.
- →Don't use non-breathable membranes (polythene) on the outside — moisture will be trapped in your walls.
Roofing & Cladding
Now your shell is weatherproof, add the final roof covering and exterior cladding. Popular UK choices: corrugated metal roofing (lightweight, durable) and timber cladding (larch, cedar, or Siberian larch).
What you need to know
- Corrugated metal (steel or aluminium) is the go-to for THOW — lightweight, long-lasting, and easy to install with tek screws.
- For timber cladding, larch is the best UK-native option — it silvers beautifully and needs no treatment. Cedar is excellent but pricier.
- Always install cladding on battens (25mm minimum) to create a ventilated rain screen — this is critical for preventing rot.
- Consider Cedral fibre-cement boards for a maintenance-free alternative.
Stage 7 Checklist
- Install roof covering (metal sheets, tiles, or EPDM rubber)
- Fit ridge caps and verge trims
- Install vertical battens for ventilated rain screen
- Fix cladding boards from bottom to top
- Seal around window and door openings with flashing tape
- Apply treatment/oil to cladding if required (not needed for larch)
- Install guttering and downpipes
Pro Tips
- →Larch from a local sawmill is often half the price of merchant timber — and you're supporting UK forestry.
- →EPDM rubber membrane is excellent for flat or low-pitch roofs — a single sheet, no joints, 50-year lifespan.
Insulation & Vapour Barrier
Insulation is arguably the most important stage for UK comfort. Your tiny house has a high surface-area-to-volume ratio, so it loses heat fast. Insulate walls, roof, and floor to the highest standard you can afford.
What you need to know
- PIR rigid board (Celotex/Kingspan): Best thermal performance per mm. U-value of 0.022 W/mK. Cut to friction-fit between studs, seal edges with expanding foam.
- Sheep's wool: Natural, breathable, handles moisture brilliantly. Slightly lower R-value but excellent for UK damp climate. Treats itself for moths.
- Wood fibre board: Excellent thermal mass (keeps cool in summer too). Breathable. More expensive but outstanding performance.
- Apply a vapour control layer (VCL) on the warm side (interior) of insulation. Use a smart membrane like Intello Plus that adapts to humidity.
Stage 8 Checklist
- Insulate walls between studs (full depth, no gaps)
- Insulate roof between and/or over rafters
- Verify floor insulation is complete and sealed
- Fill all gaps around pipes and wires with expanding foam
- Install VCL on interior side of all insulated surfaces
- Tape all VCL joints and seal around penetrations
- Check for thermal bridges at corners and junctions
Pro Tips
- →The cheapest insulation is the insulation you install properly — gaps and compression destroy performance.
- →Don't skimp on the roof — heat rises, and an under-insulated roof is your biggest energy loss.
Electrical First Fix
Run all cables, install back boxes, and position your consumer unit before the walls are closed up. In the UK, electrical work in a dwelling must comply with Part P of the Building Regulations.
What you need to know
- For a permanent dwelling: all electrical work must be designed, installed, or certified by a registered electrician (e.g. NICEIC, NAPIT, ELECSA).
- For a caravan-classified THOW: wiring should follow BS 7671 (IET Wiring Regulations) and ideally be signed off by a qualified electrician.
- Use 2.5mm² twin & earth for ring mains (sockets), 1.5mm² for lighting circuits, and 6mm² or 10mm² for high-draw appliances (oven, shower).
- Install an RCD-protected consumer unit. Consider a dual-supply setup: mains hook-up + solar inverter.
Stage 9 Checklist
- Plan and mark all socket, switch, and light positions
- Install consumer unit in accessible location
- Run cable routes through studs (drill centre of stud, never notch)
- Install back boxes for sockets and switches
- Run cables for dedicated circuits (cooker, shower, hot water)
- Install smoke and CO alarm wiring
- Photograph all cable routes before closing walls
Pro Tips
- →Always photograph your cable routes before plasterboarding — future-you will thank present-you.
- →Consider USB sockets throughout — they're cheap and incredibly convenient in a small space.
Plumbing & Gas
Install all water supply pipes, waste pipes, and any gas lines before closing up walls. In a tiny house, short pipe runs and a compact layout mean plumbing is simpler than in a conventional house.
What you need to know
- Use 15mm push-fit (e.g. JG Speedfit) for hot and cold water supply — easy to install, no soldering, and leak-free if done properly.
- Run 40mm waste pipes for sink/shower, 110mm for toilet (if using a conventional flush).
- Consider a combi boiler (Rinnai, Paloma) for instant hot water — no tank needed. Or an electric point-of-use heater.
- If using gas (LPG): all gas work must be done by a Gas Safe registered engineer. No exceptions.
Stage 10 Checklist
- Install hot and cold supply pipes to kitchen and bathroom
- Install waste pipes with correct falls (1:40 minimum)
- Fit isolation valves at each appliance
- Install water heater (combi boiler, electric, or heat pump)
- Run overflow and pressure relief pipes to exterior
- Pressure test all supply pipes before closing walls
- Install any gas supply lines (Gas Safe engineer only)
Pro Tips
- →A composting toilet eliminates the need for a 110mm soil pipe and sewage connection — massively simplifying your build.
- →Insulate all hot water pipes to reduce heat loss in such a small space.
Interior Fit-Out
The fun part! Close up walls with plasterboard or tongue-and-groove timber, install your kitchen, bathroom, flooring, and all fixtures. This is where your tiny house starts to feel like home.
What you need to know
- Plasterboard (12.5mm) gives a smooth, paintable finish but adds weight. Tongue-and-groove timber (pine, spruce) is lighter and adds warmth.
- For kitchens, IKEA METOD units are popular — compact, affordable, and well-designed for small spaces. Or go bespoke with birch plywood.
- Engineered wood or vinyl click flooring is ideal — it's thin, durable, and handles the movement of a THOW.
- Install a folding/Murphy bed or loft bed to maximise floor space.
Stage 11 Checklist
- Install wall lining (plasterboard or T&G timber)
- Skim plasterboard and let dry (if applicable)
- Install flooring throughout
- Fit kitchen units, worktop, and splashback
- Install bathroom (shower tray, basin, toilet)
- Hang interior doors
- Complete electrical second fix (sockets, switches, lights)
- Complete plumbing second fix (taps, shower, connections)
- Paint / treat all interior surfaces
Pro Tips
- →Build in as much storage as possible — under stairs, under beds, above doors. You'll need every cubic centimetre.
- →Use light colours and mirrors to make the space feel bigger. A single accent wall adds character without closing the space in.
Final Fix & Move-In
Snagging, certification, final connections, and making it yours. This stage is about getting everything inspected, fixing any issues, and preparing for occupancy.
What you need to know
- Walk through every system: test every socket, check every tap, flush the toilet, run the shower, test all lighting circuits.
- Get your electrical installation tested and certificated (Electrical Installation Certificate or Minor Works Certificate).
- If gas has been installed, get a Gas Safe certificate.
- If on permanent foundations, arrange your Building Control completion inspection.
- Set up utilities: water supply connection, electricity meter, broadband.
Stage 12 Checklist
- Complete a full snagging list (walk every surface, check every fitting)
- Get electrical certification
- Get gas certification (if applicable)
- Get Building Control sign-off (if applicable)
- Install smoke alarms and CO detector (hard-wired or sealed battery)
- Set up broadband / mobile signal booster
- Install exterior lighting and house number
- Connect to water and drainage (or set up off-grid systems)
- Move in and celebrate 🎉
Pro Tips
- →Create a snagging spreadsheet — go room by room and be ruthless. Fix everything before you move in.
- →Take photos of your completed build from every angle — you'll want them for insurance purposes.
Essential Essential Tools
The tools and materials you'll need throughout your build.

Fluke 117 Electricians Digital Multimeter
True-RMS multimeter for safely commissioning your 12V/24V DC and 230V AC systems — non-contact voltage detection built in.
View on Amazon
Knipex Pliers Wrench 3-Piece Set
Smooth-jaw adjustable wrenches that won't chew up plumbing fittings — perfect for tightening compression joints on water and gas runs.
View on Amazon Featured
Makita DLX2414ST 18V LXT Combi Drill & Impact Driver Twin Kit
Professional 18V combi drill plus impact driver with two 5.0Ah batteries, charger and case. The everyday workhorse for framing, decking and fixing out a tiny house build.
View on Amazon
Makita DJR187Z 18V LXT Brushless Reciprocating Saw
Cordless brushless reciprocating saw for demolition, trimming nail-embedded timber, and rough cuts during framing. Body-only. Indispensable for site work and rebuild jobs.
View on Amazon